
Pre-production is the planning phase where you ensure your activewear is ready for manufacturing. This process involves creating samples, sourcing materials, and finalizing designs to avoid expensive errors later. For activewear, it’s especially critical due to the performance demands of fabrics and precise sizing requirements. Here’s what you need to know:
- Plan thoroughly: Define your product strategy, budget, and production timeline.
- Get technical details right: Create detailed tech packs, choose the right fabrics, and finalize patterns.
- Collaborate with your factory: Confirm capabilities, certifications, and production schedules.
- Test thoroughly: Conduct wear trials and performance tests to ensure durability and fit.
- Finalize production: Approve samples, confirm material availability, and set up quality control standards.
Pre-production ensures your activewear meets quality expectations, avoids costly mistakes, and sets the stage for a successful launch.
How Athletic Wear is Made | BTS of a China Clothing Manufacture | NEW 2024 Clothing Technology
Step 1: Set Up Your Pre-Production Plan

Activewear Production Timeline: From Tech Pack to Final Inspection
Laying a solid pre-production foundation is crucial for defining budgets, timelines, and preparing for your product’s market launch. A well-organized planning phase ensures everything stays on track and is delivered on time.
Define Your Product Strategy and Line Plan
Start by crafting a product concept that solves a specific problem for your target audience. For instance, you might design squat-proof leggings that remain opaque during deep stretches. Your strategy should focus on addressing a genuine need rather than adding to an already crowded market.
Next, identify your target customer with precision. Build detailed customer personas, considering factors like demographics (age, income, location) and psychographics (lifestyle, values, motivations). These profiles will guide decisions about everything from fabric choices to sizing options.
Outline your core product lineup with specific uses in mind. Determine your size range – will you stick to XS–XL, or include extended sizes? Decide on the fit: compression, relaxed, or both? These choices will directly influence your pattern-making and production costs. Once you have a clear strategy, establish your budget and decide on order volumes to ensure smooth execution.
Set Your Budget and Order Volumes
Define your production budget in USD early, taking into account costs of goods sold (COGS) and other related expenses. Understanding pricing terms is essential:
- FOB (Freight on Board) covers the product cost up to the origin port but excludes freight, duties, taxes, and insurance.
- DDP (Delivered Duty Paid) or LDP (Landed Duty Paid) includes all costs, right up to delivery at your door.
For startups, aim for minimum order quantities (MOQs) of 100–300 pieces per style. While smaller order volumes may come with higher costs per unit, they can also mean quicker turnaround times. Carefully weigh these trade-offs based on your cash flow and launch timeline.
Document everything in writing – pricing, minimums, payment terms, and delivery dates. Clear agreements help avoid misunderstandings down the line.
Create a Production Timeline
Develop a production calendar with firm deadlines for each stage, including tech pack submissions, sample reviews, and final approvals.
Here’s an example of a realistic timeline for activewear production:
| Stage | Typical Timeframe | Key Actions |
|---|---|---|
| Submit Tech Packs | – | Provide detailed specs and fabric requirements |
| First Sample | 1–2 weeks | Review fit, fabric, trims, and overall design |
| Revised Sample | 1 week | Make corrections and adjustments |
| Golden Sample | 3–4 days | Approve for bulk production |
| Inline Inspection | During production | Conduct quality checks during sewing/packing |
| Final Inspection | Before shipment | Perform a comprehensive quality review |
Add extra time to every stage – at least an additional week or more, especially if you’re new to production or working with an unfamiliar factory. As Startup Fashion wisely notes:
"Everything always takes way more time than you think".
This buffer helps protect your launch date from unexpected delays.
Set reminders for key deadlines and regularly check in to monitor progress. Your production timeline will serve as a roadmap, ensuring accountability and keeping everyone aligned throughout the pre-production process.
Step 2: Complete Technical Product Specifications
Getting your technical specifications right is crucial – it’s where many production challenges either get resolved or, unfortunately, take root. Detailed documentation removes uncertainty and ensures your factory knows exactly what to produce.
Prepare Tech Packs for Each Style
Think of a tech pack as the instruction manual for your product. It’s a detailed document that translates your design into precise manufacturing instructions. A well-prepared tech pack keeps everyone on the same page, minimizing mistakes and avoiding expensive revisions.
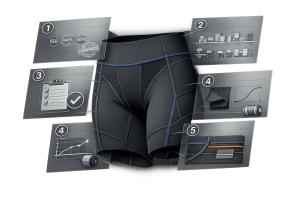
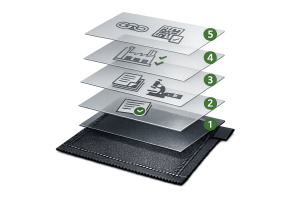
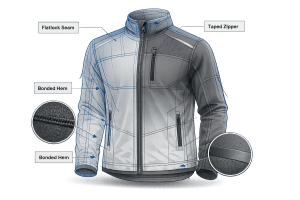
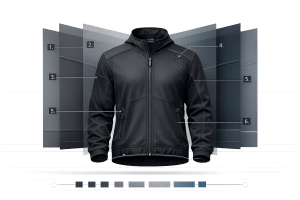
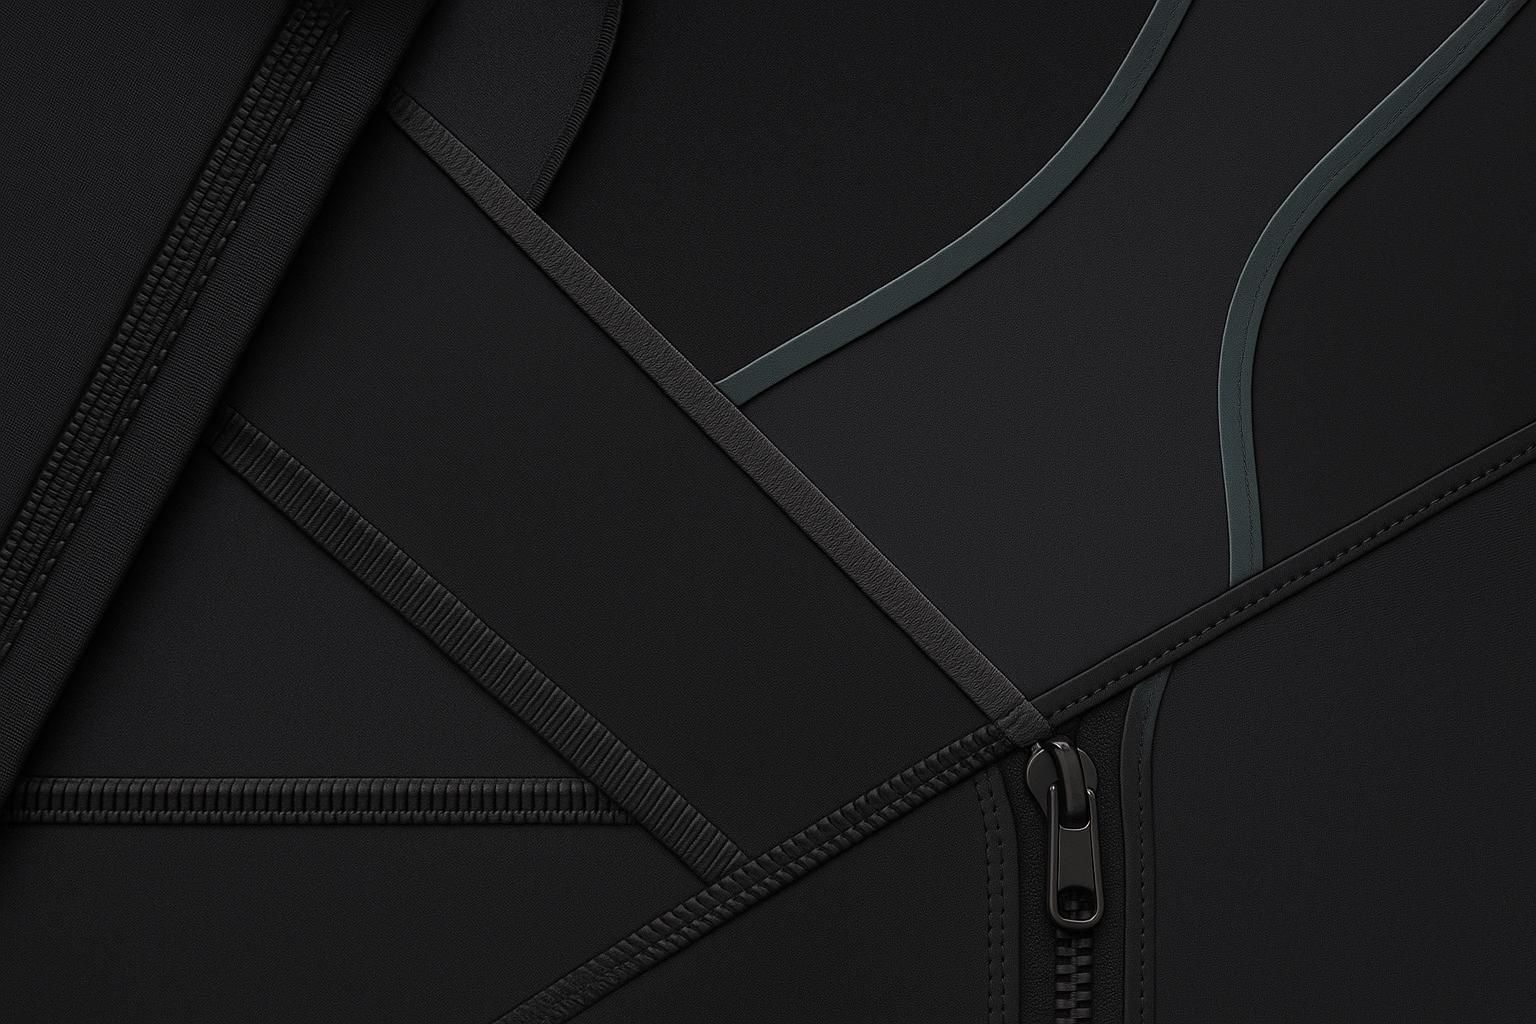
For activewear, your tech pack should include clear visual elements like flat sketches showing the front, back, and side views. These sketches should highlight every construction detail. Include graded measurements, whether flat or stretched, and specify the intended fit – compression or relaxed. Outline all construction details, such as seam types (e.g., flatlock, overlock), stitch counts per inch, and elastic widths. Be sure to mark branding placements accurately, specifying logo sizes and their exact positions in inches from seams.
Double-check all measurements and specifications before submitting the tech pack. For activewear, fabric stretch and performance details are especially important. Clearly outline fabric properties, such as stretch, recovery, and moisture management capabilities, based on the performance standards you need. This level of detail will make the next step – fabric selection – much smoother.
Select Fabrics and Set Performance Requirements
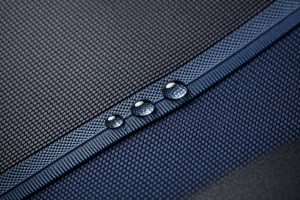
Choosing the right fabric can make or break your activewear. Today’s market offers more than basic moisture-wicking materials; there are advanced fabrics that actively enhance athletic performance.
Document fabric specifications like GSM (grams per square meter), stretch percentages (usually within the 20–40% range), and recovery rates. For moisture-wicking fabrics, specify the required performance level. If you need features like anti-odor treatments, UV protection, or specific pilling resistance, include those details as well.
When narrowing down fabric options, focus on three main factors:
- Design compatibility: Can the fabric handle stitching while maintaining your design’s look and feel?
- Comfort: Does it provide softness, stretch resistance, and full mobility?
- Durability: Is the fabric strong enough to endure frequent washing and high-intensity use?
Request swatches and technical data sheets from your manufacturer to confirm the fabric meets your needs. Having accurate fabric information is essential for developing precise patterns.
Finalize Patterns and Fit Blocks
Once your tech packs and fabric choices are finalized, it’s time to refine your patterns. Start with a base pattern tailored to your size range and establish grading rules to maintain consistent sizing. A well-executed pattern ensures your garments fit well, allow flexibility, and minimize friction.
To test your patterns, conduct wear trials. Have testers wear samples during actual workouts – not just standing in front of a mirror. Athletes’ feedback on these samples provides valuable insights into how the garments perform in real-life conditions.
Document any changes made during the fit sample review process and create a master fit block. This fit block will become your standard reference for future collections. Investing in precise patterns and fit blocks not only reduces returns due to sizing issues but also builds customer confidence in your brand’s consistency.
Step 3: Coordinate with Your Manufacturing Partner
With your tech packs and patterns finalized, it’s time to connect with your factory to iron out the practical details. This step is crucial for ensuring your production process runs smoothly and avoids unexpected hiccups.
Review Factory Capabilities and Certifications
Before moving forward, confirm that your chosen factory has the necessary equipment and expertise to handle activewear production. Performance apparel often requires specialized tools like bonding machines for seamless finishes, laser cutters for precise detailing, and flatlock sewing machines for smooth, comfortable seams. Without these, achieving the quality your brand promises can be a challenge.
Certifications are just as important as equipment. Look for certifications such as BSCI (Business Social Compliance Initiative) and WRAP, which verify ethical labor practices, safe working conditions, and fair treatment of workers through regular third-party audits. If your brand emphasizes sustainability, check for the Global Recycled Standard (GRS) to ensure traceability of recycled materials and EPR (Extended Producer Responsibility) certifications to demonstrate accountability.
When it comes to product safety, certifications like OEKO-TEX® STANDARD 100 and REACH Regulation compliance are essential. OEKO-TEX® ensures your products are free from over 300 harmful substances, while REACH compliance is mandatory for selling in the EU market. These verifications not only protect your customers but also safeguard your brand’s reputation.
Confirm MOQs, Lead Times, and Payment Terms
Set clear expectations for minimum order quantities (MOQs), lead times, and payment terms by documenting them in a binding contract. For emerging activewear brands, MOQs often range from 100 to 300 pieces per style. This range strikes a balance between testing your market and achieving production efficiency.
| Criteria | Key Considerations |
|---|---|
| Product Focus | Sports/activewear, technical knits |
| MOQ | 100–300 pcs/style for startups |
| Certifications | ISO, BSCI, OEKO-TEX (if applicable) |
| Sample Lead Time | Aim for under 2 weeks |
Create a development calendar that outlines all sample stages and bulk production timelines. Ideally, sample lead times should be less than two weeks. If you’re new to manufacturing or working with a new partner, it’s wise to build in extra time at every stage.
"Everything always takes way more time than you think." – startupfashion.com
Payment terms should also be clearly defined in your purchase order (PO). The PO should specify the products, quantities, size and color breakdowns, and agreed-upon prices. This document acts as a safeguard for both you and your manufacturing partner, reducing the risk of misunderstandings.
Set Up Communication and Approval Workflows
Strong communication is key to avoiding production errors. Designate a primary point of contact at the factory and schedule regular check-ins. Use shared tools – like a cloud-based platform or detailed notes within your tech packs – to track revisions, comments, and approvals.
Establish a clear approval process for each sample stage, and be meticulous about documenting changes with dates. Avoid relying solely on email threads to prevent miscommunication.
"I always tell designers that their tech pack isn’t done unless it’s more detailed than they think it should be." – startupfashion.com
Before production begins, hold a pre-production meeting with your factory’s production, quality, and sourcing teams. Use this time to address requirements, discuss potential challenges, and confirm key dates. Retain all development samples throughout the production process so they can serve as a reference if any discrepancies arise.
sbb-itb-8dbc09a
Step 4: Handle Sampling and Quality Control
Sampling and quality control are essential to validating your activewear designs. This step ensures your product performs as intended and meets customer expectations. Skipping this stage can lead to costly production mistakes and hurt your brand’s reputation.
Plan Your Sampling Stages
A well-structured sampling process helps identify potential issues early in development. Begin with a proto sample to confirm your initial design and construction methods. Once that’s approved, move on to a fit sample to check sizing and proportions on a live model or dress form. Next, create a size set sample to ensure consistent grading across all sizes, from small to extra-large. Finally, request a pre-production sample made with actual production materials and processes. This sample will serve as your benchmark for bulk production.
Before starting the sampling process, perform pre-production checks on raw materials, trims, and approved samples to make sure they align with your original specifications.
Once your samples are ready, it’s time to conduct performance tests and wear trials.
Perform Performance Tests and Wear Trials
Activewear needs to go through more rigorous testing than standard garments. These clothes must handle movement, moisture, and repeated washing. Start with stretch tests to ensure fabrics bounce back after being pulled. Run wash tests to check that garments maintain their shape and dimensions, aiming for shrinkage of no more than 3–5%. For printed logos or graphics, test durability through at least 25 wash cycles to confirm they won’t crack or fade. Check abrasion resistance to ensure the fabric won’t pill or wear thin in high-friction areas like the inner thighs or underarms.
If your activewear includes special features like UV protection or compression, validate these claims using standardized testing methods such as ISO, AATCC, or ASTM standards. Test colorfastness to confirm resistance to washing (ISO 105-C06), rubbing (ISO 105-X12), and light exposure (ISO 105-B02), and perform wet and dry rub tests using a white tissue to check for color transfer.
Other components like zippers and buttons should withstand at least 5,000 cycles of use, while labels must endure 10 or more washes without fading. Maintain a stitch density of 7–12 SPI (stitches per inch) for strong seams, and conduct seam slippage tests to ensure seams hold under stress. Fit tests, whether on mannequins or live models, are also crucial to confirm comfort, proper fit, and freedom of movement during activities like squats, lunges, or overhead reaches.
The results of these tests will guide the creation of your quality control (QC) checklists.
Define QC Standards and Inspection Procedures
Once your samples pass performance tests, it’s time to set clear QC standards. These standards help eliminate guesswork and ensure consistency. Define your Acceptable Quality Level (AQL) – for apparel, this usually allows 2.5% major defects and 4% minor defects. Establish tolerances for key measurements like inseam length, waistband width, and sleeve length. For color consistency, aim for a variance of ≤0.5 Delta E.
Develop detailed QC checklists that cover visual inspections, measurements, functionality, packaging, labeling, and compliance standards. These checklists should be shared with both your team and the factory’s QC staff to ensure everyone is aligned on expectations and inspection methods.
Adopt a multi-stage inspection process: check raw materials during pre-production (major manufacturers often reject 5–10% of fabric rolls due to visible defects), conduct in-line inspections during production to catch issues early, and perform final inspections before shipping. This layered approach helps catch small problems before they escalate into costly errors.
Step 5: Complete Final Production Checks
With your samples approved and quality standards clearly defined, it’s time to wrap up the final production details. This step is crucial to ensure a smooth transition into bulk manufacturing and to avoid costly mistakes or delays.
Sign Off on All Samples and Documents
Double-check that your tech pack includes every necessary detail: sketches, construction methods, trims, fabrics, labeling, colorways, and graded specifications. Before giving the green light, review the golden sample and size set samples one last time. The golden sample – crafted using actual production materials and processes – serves as your official approval and becomes the standard for bulk production.
Also, make sure the Bill of Materials (BOM) is complete. It should list every component, including fabric types, trim sizes, colors, locations, quantities, and vendors. This document is key to avoiding confusion once production begins.
Confirm Material Availability and Factory Schedule
Ensure that all bulk materials meet the approved specifications and confirm their availability. Next, review the factory’s production schedule to verify that it aligns with your timeline. Make sure there’s some buffer time built in for any unexpected delays. Pin down the production start and estimated completion dates, and establish who will oversee production progress and how updates will be communicated.
Once these details are sorted, you can move on to finalizing your packaging and shipping plans.
Lock In Packing and Shipping Details
Your packaging needs to protect the garments during transit while also being cost-efficient. Finalize the artwork for all labels, ensuring they meet U.S. standards. These labels should include your branding, product information, barcodes, SKU numbers, PO numbers, and batch codes. Lastly, confirm your shipping arrangements, including carrier selection, delivery timelines, and any special handling requirements, to ensure your products reach distribution centers without a hitch.
Conclusion
Pre-production plays a critical role in shaping the success of your brand. Having a well-organized checklist can help minimize delays and unexpected costs, ensuring a smoother development process and accurate manufacturing. For startups, completing the pre-production process for a single design can take anywhere from 12 to 18 months.
Collaborating with a skilled factory can make a world of difference. For instance, manufacturers like New Dong Huang Garment Co., Ltd., with over 27 years of experience in activewear production, excel at interpreting and implementing detailed tech packs. They specialize in meeting the unique demands of activewear, such as compression, four-way stretch fabrics, and tailored athletic cuts. Their expertise highlights just how essential careful planning and thorough reviews are to achieving your production goals.
FAQs
What should be included in a tech pack for activewear?
When creating a tech pack for activewear, it’s essential to include all the key information your manufacturer needs to turn your designs into reality. Start with flat sketches or CADs, which give a clear visual representation of your design. Add colorways to showcase the color options and sizing charts to define the fit. Including reference images can further clarify your vision.
Don’t forget the technical details: list fabric and trim specifications, focusing on performance materials that meet the demands of activewear. Provide precise measurements and detailed construction notes to ensure the final product matches your expectations. A well-prepared tech pack reduces production errors and makes communication with your manufacturer smoother and more efficient.
What should I consider when selecting fabrics for my activewear line?
When selecting fabrics for your activewear collection, think about how they perform, how comfortable they feel, and how well they suit the activities your customers will be doing. Some popular choices include:
- Polyester: Known for its moisture-wicking abilities and durability, making it a go-to for many activewear pieces.
- Nylon: Offers excellent strength and dries quickly, which is ideal for high-intensity workouts.
- Spandex: Provides the stretch and flexibility needed for movement-focused activities like yoga or Pilates.
If your line caters to more specific needs, you might explore merino wool, which helps regulate temperature and resists odors – a great option for outdoor or cold-weather gear. For brands leaning into eco-friendly options, recycled polyester or bamboo fabrics can add a sustainable touch to your designs.
Always consider factors like the climate, how the pieces will be used, and the overall texture to ensure your activewear delivers the quality and comfort your customers expect.
What certifications should I check for when choosing an activewear manufacturer?
When choosing an activewear manufacturing partner, it’s crucial to focus on certifications that guarantee ethical practices, responsible production, and consistent quality. Key certifications to consider include WRAP (Worldwide Responsible Accredited Production) for ethical manufacturing practices, ISO 9001 for effective quality management systems, and BSCI (Business Social Compliance Initiative) for maintaining fair workplace standards.
To address sustainability and material safety, look for certifications like OEKO-TEX Standard 100, which ensures fabrics are tested for harmful substances, GOTS (Global Organic Textile Standard) for organic material compliance, and Fair Trade, which supports ethical sourcing. These certifications not only help your products meet high industry standards but also align with the growing demand for responsible and transparent manufacturing.